Links

Wednesday, October 29, 2014

just a quick post today....

how is everyone??
to be honest, im so busy i havent scrapped much at all. 
im definitly going to have to take time out on the weekend to scrap otherwise i have nothing to show you for next wednesday...and we cant have that now can we??
here is my page

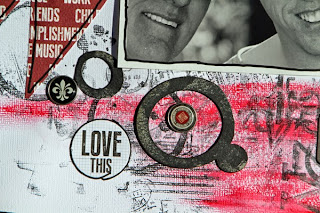
with a close up of flourish 104 (set of 3)


i covered the a2z scraplets with gesso from my finger so that it is all bumby then i lightly ink over the top. i have layered 2 of the flourishes on top of each other. one is green and one is pink. 

well unfortunatly that is all from me today but i will be back on wednesday to show you more
happy scrapping


Monday, October 27, 2014

Hi there, Yvette with you today with another couple of layouts for A2Z Scraplets for you to check out.

First up is a beachy layout, perfect considering the hot summery weather we've got in store for us over the next few days in my neck of the woods.


The chippies I used on this layout are "Perfect","#lifeisgreat" and the "clouds".

Here are some close up…


I coated all the words with Antique white paint and while it was still wet I sprinkled some sand over them.  And for the clouds I generously coated them in Dimensional Effects then spritzed them with Glimmermist to take the starkness of the white off them.


My next page is one I did for my Miss 16 to commemorate her getting her Learners Licence.  The "Learner" chipboard I used is an older one, but one which I HAD to use.


Close up of the chipboard...


I coloured the square around the L with a distress marker, covered the rest of the letters with black paint, then coated it all with Dimensional Magic for some shine.


Thanks for stopping by today.
Until next time, happy scrapping!
Yvette x


Sunday, October 26, 2014

Scrapbooking your heritage

Hi Deb here with you again. Today I'm sharing a couple of pages, the first being a heritage style. I am fortunate enough to have know the past generations of my family and have great memories of them. This first page is a great aunt who lived to a great age of 108! That meant I had her in my life for 40 years, a great feat in itself.


 I used the set of Clock Hands to make a corner, inking them with a pink pigment ink and adding a touch of metallic pigment ink as highlights. This gave it an aged look.


 I used the same technique on the Steampunk Heart which I felt suited the style and era of the photo.

Materials used: 
Graphic45 papers, stickers and embellishments
Reminisce Flowers
Epoxy dome
Inks


My second page is a little bit newer photo - my two youngest at the football in Melbourne. This is a very simple layout but a great memory from a wonderful time in life.


On this page I used the title Footy Fan and coloured it with chalks. Finishing it off with an outline. You will need to spray a fixative on your chalked pieces to avoid them rubbing off if handled.


I also used one of the football players from the set of Footballers. Again colouring it with chalks and a pen outline.


Materials used:
White, Black and Blue Cardstock
Jenny Bowlin Bingo Card
Maya Road Metal Clip
Smash Clip
Small Epoxy dome

Until Next time, 
Happy Scrapping
Deb


Friday, October 24, 2014

Hello...

Today I'm back for my 2nd post for the month.
Hope everyone has been keeping well.
Me...I'm getting ready for the weekend.

Better get to it..

For the Record

I recently took this pic of my dad and brother...a rare to get anytime.


I have used:

Border Strip-Circles

Here are a couple of close ups...


Day at the Park

Bridget loves going to the park. On this particular day she climbed to the very top for the first time.


I have used:

Arrows
Day At the Park Title

Here are a couple of close ups:


Anything is Possible


I have used:

Arrows

I love using the chipboard raw and just outlining it to make it "pop".

Here is a close up:

well hope you all have a great weekend...


Wednesday, October 22, 2014

beautiful

I made this page together with my little helper... my 6 year old daughter. I think we managed to make a pretty page together.


We glued down lots and lots of buttons and pearls and when dry we covered it all with gesso. Again we had to with for it to dry and then it was time to spray, add water and dry. Finally we stamped all over the buttons with a text stamp. Love the result 


Supply:
Lots of buttons and pearls
Gesso and color mist
Text stamps made using Teresa Collins Stampmaker 
Martha Stewart border punch
Heidi Swapp Dreamy paper pad
A2Z Scraplets used: BEAUTIFUL BORDER WORD


Monday, October 20, 2014

First layout of Caz's first grand baby

Hi
Caz here with you today. Sharing my first creation of my gorgeous new grand daughter born on October 6 2014. The scraplet I used was A proud moment. Just perfect for this special occasion.
 I just added a coat of gesso to the title with my fingers as it matched nicely with the papers.
I hope you had a lovely weekend and had some quality craft time
Till next time
Happy Crafting
 

Sunday, October 19, 2014

Weird and Wonderful

Hi, Deb here with you. For this post I thought I'd share another couple of pages I did while on a break.

This first page is using the new "Weird and Wonderful" title and is perfect for this photo. I wonder if anyone else has 'one of these in their family'?


Being a girly page I decided to use a simple finish that still had a bit of pizazz and bling - simply paint and glittered dimensional paint.


Using a stencil and embossing thread I added a word that describes the subject to a T!


Materials used:
A2Z Scraplets Weird and Wonderful
Purple paint
Glittered Dimensional Magic
Stitching template
Thread
Bo Bunny Papers

The next page is one of my grandchildren making biscuits. I love the look on the youngest one's face! Again, this one was done on break with limited supplies - the challenge to make the most of what I had with me. 

Firstly I spread some gesso on the paper using a business card I had in my purse. The rest is layering and adding little elements from my embellishments stash that I had with me.

 
Naturally there is still chipboard on it. I'm finding the pack of Chevron strips very useful. I cut and inked a couple of pieces to add to the layering effects on the page.


To finish it off just a little more I think I might add the title 'masterchef' and a centre to the flower. 

Materials used:
A2Z Scraplets Chevron Borders
Flair
gesso
Ink
Papers

Until next time
Happy Scrapping
Deb


Friday, October 17, 2014

Lego...

Hi everyone, its Kerry here today to share some layouts with you. I have been scrapping a bit this past couple of weeks and i love how easy an A2Z scraplet can just finish a layout off for me or to grab an easy title. I sometimes find titles very hard, some layouts the title is so easy, others can be hard.

All my kids love lego. Its the one staple christmas and birthday present for them all. They are getting quite the collection between them all. So the lego A2Z pieces are used easily here. Lol.

I love to build the lego pieces up.


A quick coat of paint to give them whatever colour you desire.


I had this easter egg hunt scraplet for a while. I can struggle with bit pieces but ended up cutting this piece up. Love how it came out.


I wrapped a bit of twine around the egg for some detail.

Yes, some more lego.


What a lego man. Loved this piece.


Thanks foe stopping by and reading
Kerry xx

Monday, October 13, 2014

Hi there!  It's Monday and the start of another new week…have a feeling it will be Christmas before I know it the way the weeks are flying by.

Today I'm sharing another 2 layouts I have done using the fabulous chippies from A2Z Scraplets.

The first one is one of my son.  He took the photo of himself back in 2009 and I only recently stumbled upon it and knew immediately that I wanted to scrap it.  The chipboards I have used are:
the wordlet "amazing" from the Beautiful amazing brush words set and
the Steampunk corner.  These corners are just perfect for boys pages.


Some close ups of the chipboards:


 It's really hard to see in these photos, but I have embossed all chipboard pieces with Stampendous Shabby Blue embossing enamel, which has lots of blue glitter with flecks of gold and chunky pieces of white throughout.  It really is quite stunning to look at in real.  (just a shame it doesn't photograph well!


Products used:
Cardstock - Kaisercraft
Chipboard - A2Z Scraplets
Papermania Urban Stamp
White versa colour ink
Stampendous Shabby Blue Embossing enamel
Rubons
Metal cogs
White Dylusions spray
Lindy's Stamp Gang Tiffany Blue Spray


My second layout is one of my daughter, using "Enjoy the Journey" chipboard.   I have also used the fence, which I have actually had in my stash for quite a long time!!  Finally made use of it - hehe.


And some closeups of the chippies:

For the title I painted it with Black Soot distress paint then coated it quite generously with Crackle accents, but for some reason it didn't crackle!!  So instead it has a lovely glossy finish.


However, when I treated the fence in the same way as the title I had success!!  The fence crackled beautifully, so I then rubbed some Seedless Preserves distress paint into the cracks and gently rubbed the excess off with a baby wipe leaving the effect above.  I also rubbed the distress paint into the word banner & rubbed off the excess to highlight the words.


Products used:
Cardstock - Bazzill
Chipboard - A2Z Scraplets
Paper - Fabscraps "Fleur"
Flowers - Prima, I am Roses
Tim Holtz Idea-ology word banner
Seam binding
Distress paint - Black soot & Seedless Preserves
Bosskut leaf flourish die
Crackle accents
Kaisercraft pearl dots


Thanks for stopping by today.
Until next time, Happy scrapping,
Yvette x