
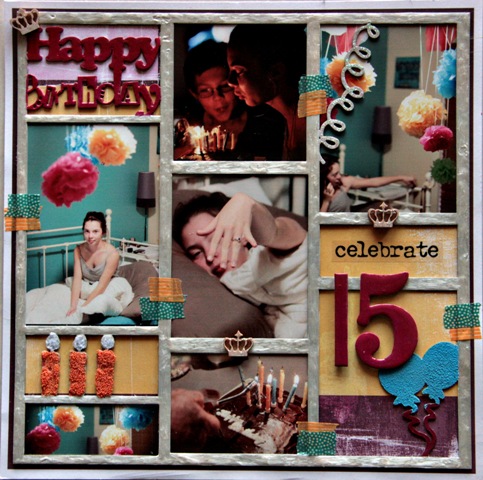
Happy Birthday Page Frame
Frames as large as this usually have me stumped as I tend to not have enough pictures to support all the frames. This is only my second Page frame that I have ever attempted. I love how versatile it is as it has embellishments that I can decorate already in some of the squares where as the first one I attempted did not all those years ago.
1. Firstly I gave the frame a coat of gesso before I started work on it.

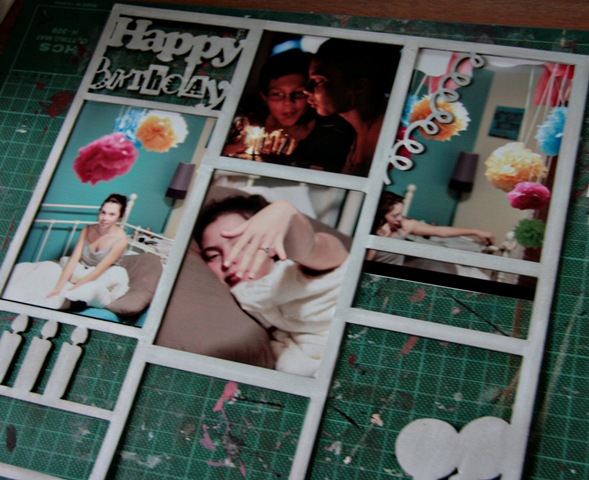
3. Turning the frame over I added tape to all the edges and then started taping down my photos. After each photo I turned the frame over and trimmed any excess photo that may have been protruding onto
the next frame.

4. Now for the fun part - decorating all the chipboard embellishments.
For the balloon I added Puff Embossing Powder which gave the chipboard a fantastic texture.


The candles I added some micro beads to the stems and Flocking for the burning candle part


to the streamer a little kindy glitz

to the happy birthday... a little pen work and some inkessentials (dimensional magic)

On the outer of the frame I chose to paint it with a Plaid white Gel paint which gave the frame a lovely marbled effect.


Finally I added the number 15 out of my stash to balance out the pink of the Happy Birthday on the opposite corner. Some washi tape to add a little more color and tie in more of the summery colors in the photos. I used some old paper i had in my stash.. Basic Grey...as my background. I painted up some timber crowns and added the sticker word celebrate.

Thanks for popping by and checking out my project for this month
have fun creating
tracey
xxx
NOTE: The new Happy Birthday Page Frame will be uploaded on the website very soon for purchase.
No comments:
Post a Comment