Showing posts with label die cut layering. Show all posts

Wednesday, October 3, 2018

"Heaven on Earth" 9x12 Scrapbook Layout by Louise

Hi Crafters


Here is a new layout "Heaven on Earth"


Sometimes when my mojo goes AWOL I like to create a 9x12 page which can sometimes kickstart my creativity.

This page uses scraps of paper with a sunburst stencil.

It was pretty busy with patterns so I left the 
fairly basic.
I gave it a coat of sparkly black embossing powder.


I also added the cutfile in the photo background and embellished with stickers and cotton.


Thanks for visiting.
Happy Scrapping. 

Wednesday, April 11, 2018

"Snapshot" Scrapbook layout by Louise

Hi Crafters


How great does it feel when you create something you love?
This page just happened!!! I love that!

"Snapshot"


I started with the background ...
I'd used the Silhouette Cameo to create a cut file.
The white hearts are the left over.
While they are still on the cutting mat, I add some glue and then lay a piece of 12x12 paper over the top.
Once dry, peel off the 12x12 and Voila ... a reverse cut file. 

I then added some Colour Blast Spray in "Bling" and let it run down the page.


I created the cluster using stash papers and then decided to have some fun adding chipboard!

I chose the Hanging hearts shape and gave it a coat of black gesso to really help lift it off the page.

Then I chose the Snapshot title and covered it with Colour Blast embossing powder in Bling.

A little gold washi tape and some sequins really help finish this page off.


Thanks for visiting.
Happy Scrapping. 

Wednesday, January 24, 2018

"It's the little things" Christmas Scrapbook layout by Louise

Hi Crafters

I love a good Christmas collection and mostly scrap my Christmas photos in the new year.
So today I'm sharing a way to use chipboard on a Christmas page.

My layout "It's the little things"


This page uses the adorable

I've coloured it with Distress Crayons firstly in red to help it pop off the neutral Christmas page and then with gold accents on the smaller words.


The background features

- Kaisercraft "Christmas Edition"
- Texture paste
- Distress ink through a stencil
- Colour Blast Shimmer Spray "Bling"
- Collectables and die cuts
- sequins
- washi tape
- stamping


I created this on a diagonal with the photo highlighted in the centre.


 It's a busy page, but not overpowering because of the neutral palette.
I love how the chipboard really pops off the background work and helps lift the photo.


Thanks for visiting.
Happy Scrapping. 

Wednesday, May 17, 2017

"Follow your heart" scrapbook layout by Louise

Hi Crafters


I've got a new layout to share "Follow your Heart"


I'd previously used this cut file and had the leftovers adhered to this beautiful Heidi Swapp "Magnolia Jane" 12x12 paper - I hunted around for a chipboard to perfectly match my page.


The Nuvo gold embossing powder was a little rough (I think I burnt it - whoops) - but I kind or like the grungy feel with the soft background.

Thanks for visiting.
Happy Scrapping. 

Wednesday, February 3, 2016

Layers, Depth and Texture

Hi there!!

Teddy and Lauren with you today with a little something that might inspire you and motivate us to make some more for you!!

So we made you a card, how clever we are!!!


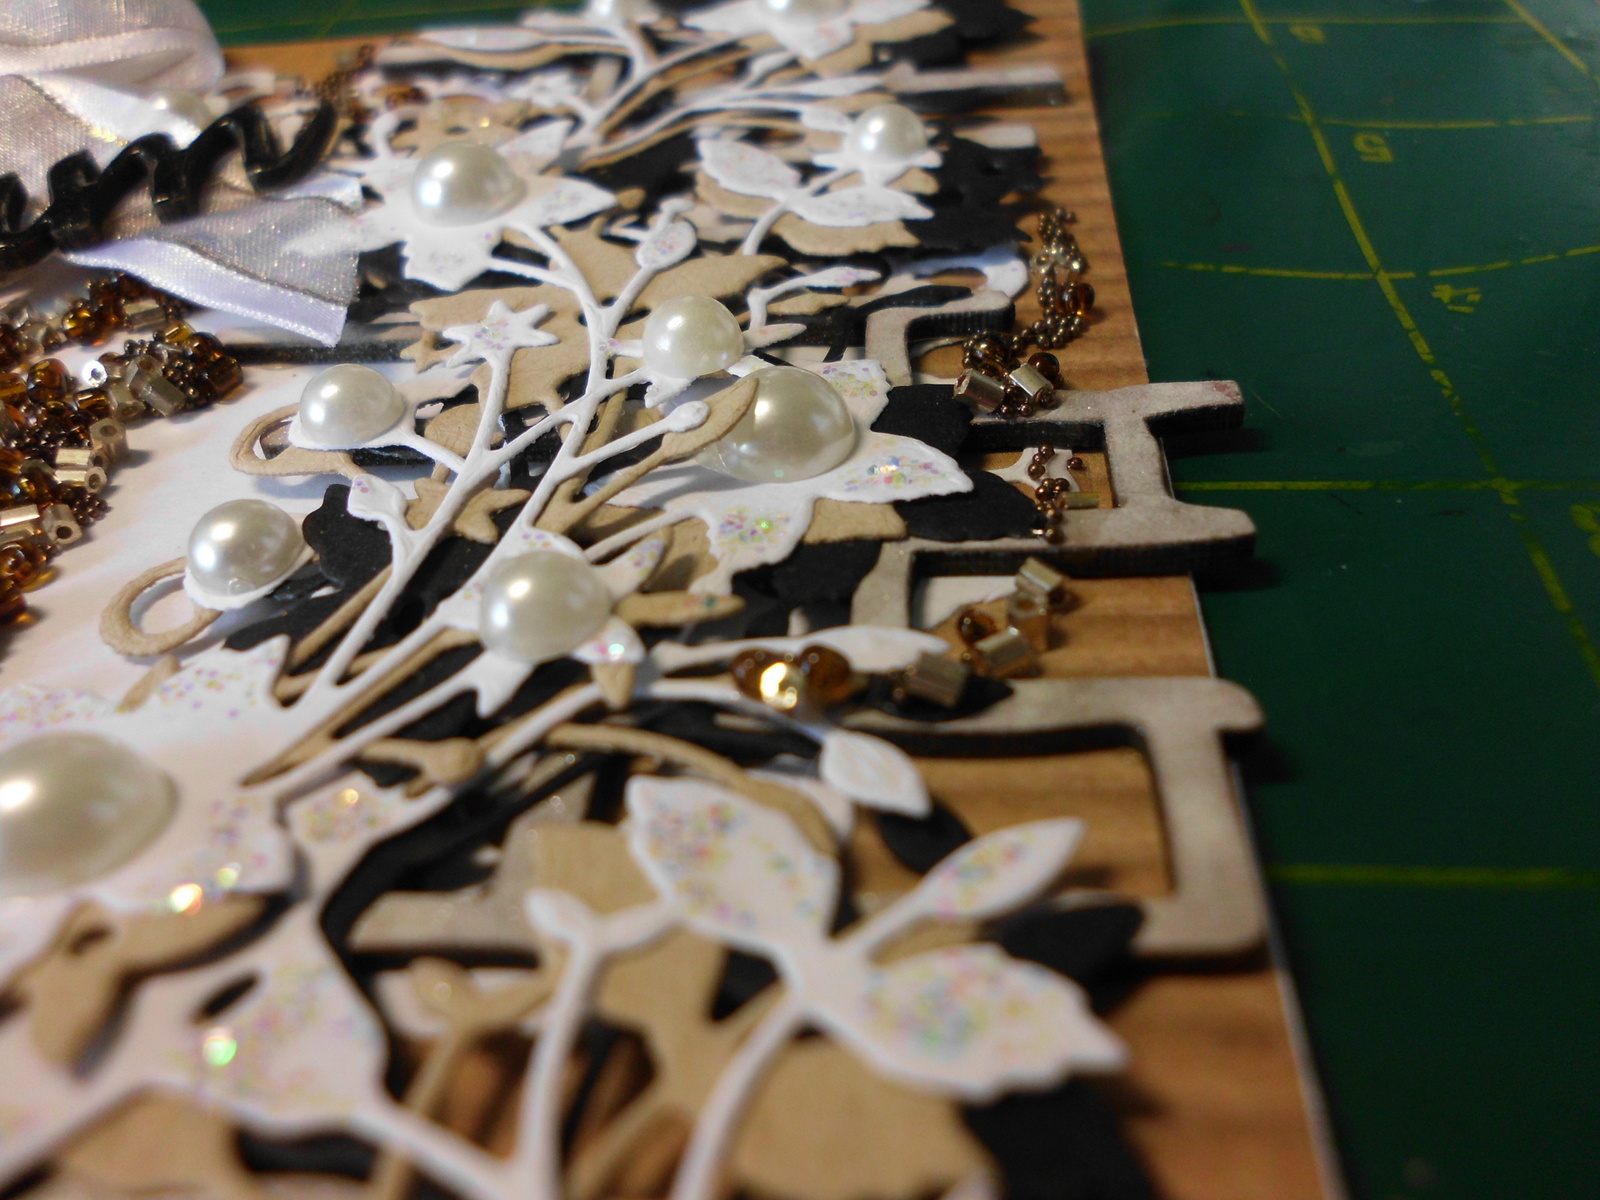
Oh this one is just packed full of goodies and is so pretty, in my favourite colours of natural with a background of Kaisercraft paper, the lace and ribbon, the lovely Catalina Wreath and Catalina Border from Memory Box Dies, A2Z Scraplets Chipboard Brick Background and A2Z Scraplets Dream word.  Finished with pearls (love my bling) and then Sugar Beads (mix of various seed beads and micro beads), just stunning.


Just loving the way the word turned out, coloured with Tombow Pen in Black and then coated with Glossy Accents (I love the way that stuff will keep its dimension while drying)


Loving that brickwork as a base to my die cut border, gives such a great feel of layering and texture, love to have different textures working together.


The die cuts have been done in three different colours and then slightly offset to give a great feeling of depth to them.  I like using this technique to really make the die cuts pop.


And just a tease to show the beads, just sprinkled over Glossy Accents where wanted and they look fantastic!!

Hope you like these effects as much as we do!!!

Love from Lauren and Teddy!!!! xxxx