Showing posts with label Laurenscraft. Show all posts

Wednesday, August 3, 2016

Tags by Lauren

Hello Everybody, Lauren and Teddy up on the blog today with a couple of tags this time.


We had such fun making this mixed media Tag of the Sea.   We started by using some Texture paste on with A2Z Scraplets Stencil Flourishes and then painting the all over with Ranger Distress Paint Broken China and then some sponging of Bundled Sage over the top.  When dry I sponged with Inka Gold Aquamarine with added water to get the mottled look.


Next came some decorating with seashell, netting, charms and microbeads over a coat of white glue (dries clear) and some touches of colour  Viva Inca Gold in colours of Gold, Jade and Rose Quartz.


When I was happy with the decorated look, I added some Inka Gold in Cobalt Blue around the edge and put the bubbles on and the A2Z Scraplets Hello.   The hello was done in Inka Gold Charcoal and Cobalt Blue and then coated with Crackle Accents.


This Christmas Tag was done with and embossing folder from Courture Creations that was sprayed with Colourblast Shimmer Spray Deep Water.

Lace and netting to decorate, a pine die cut for the foliage and the Memory Box Luxe Pointsettia .  Merry Christmas added with the A2Z Scraplets Xmas Tree


The Christmas Tree was embossed using Stampendous EP in Shabby White, I just love this stuff!!!


Now I just what to show you some different effects that can be obtained by some crackle mediums.  I love crackle, or the look of it.  All the below examples are painted prior to using a crackle medium on them.


This first one, is done in Inkssentials Crackle Accents.  Only the triangles were done, covering the sides of the triangles in one single line of medium and then pulling it to the centre, so that it was really dimensional.


This one Wrought Iron  was done with Viva Crackle Medium and gives a more opaque finish and a different effect of really squiggly cracks.  The medium was applied all over and fairly thickly.  I applied this with a palette knife as this is easier for me than a brush.


This leaf was done with Crackle Accents, I really like the way this gives the line effect at the edges of all the leaves (Simple Greens).  I must experiment more with the way this is applied as I think I get different effects with different ways of applying it.
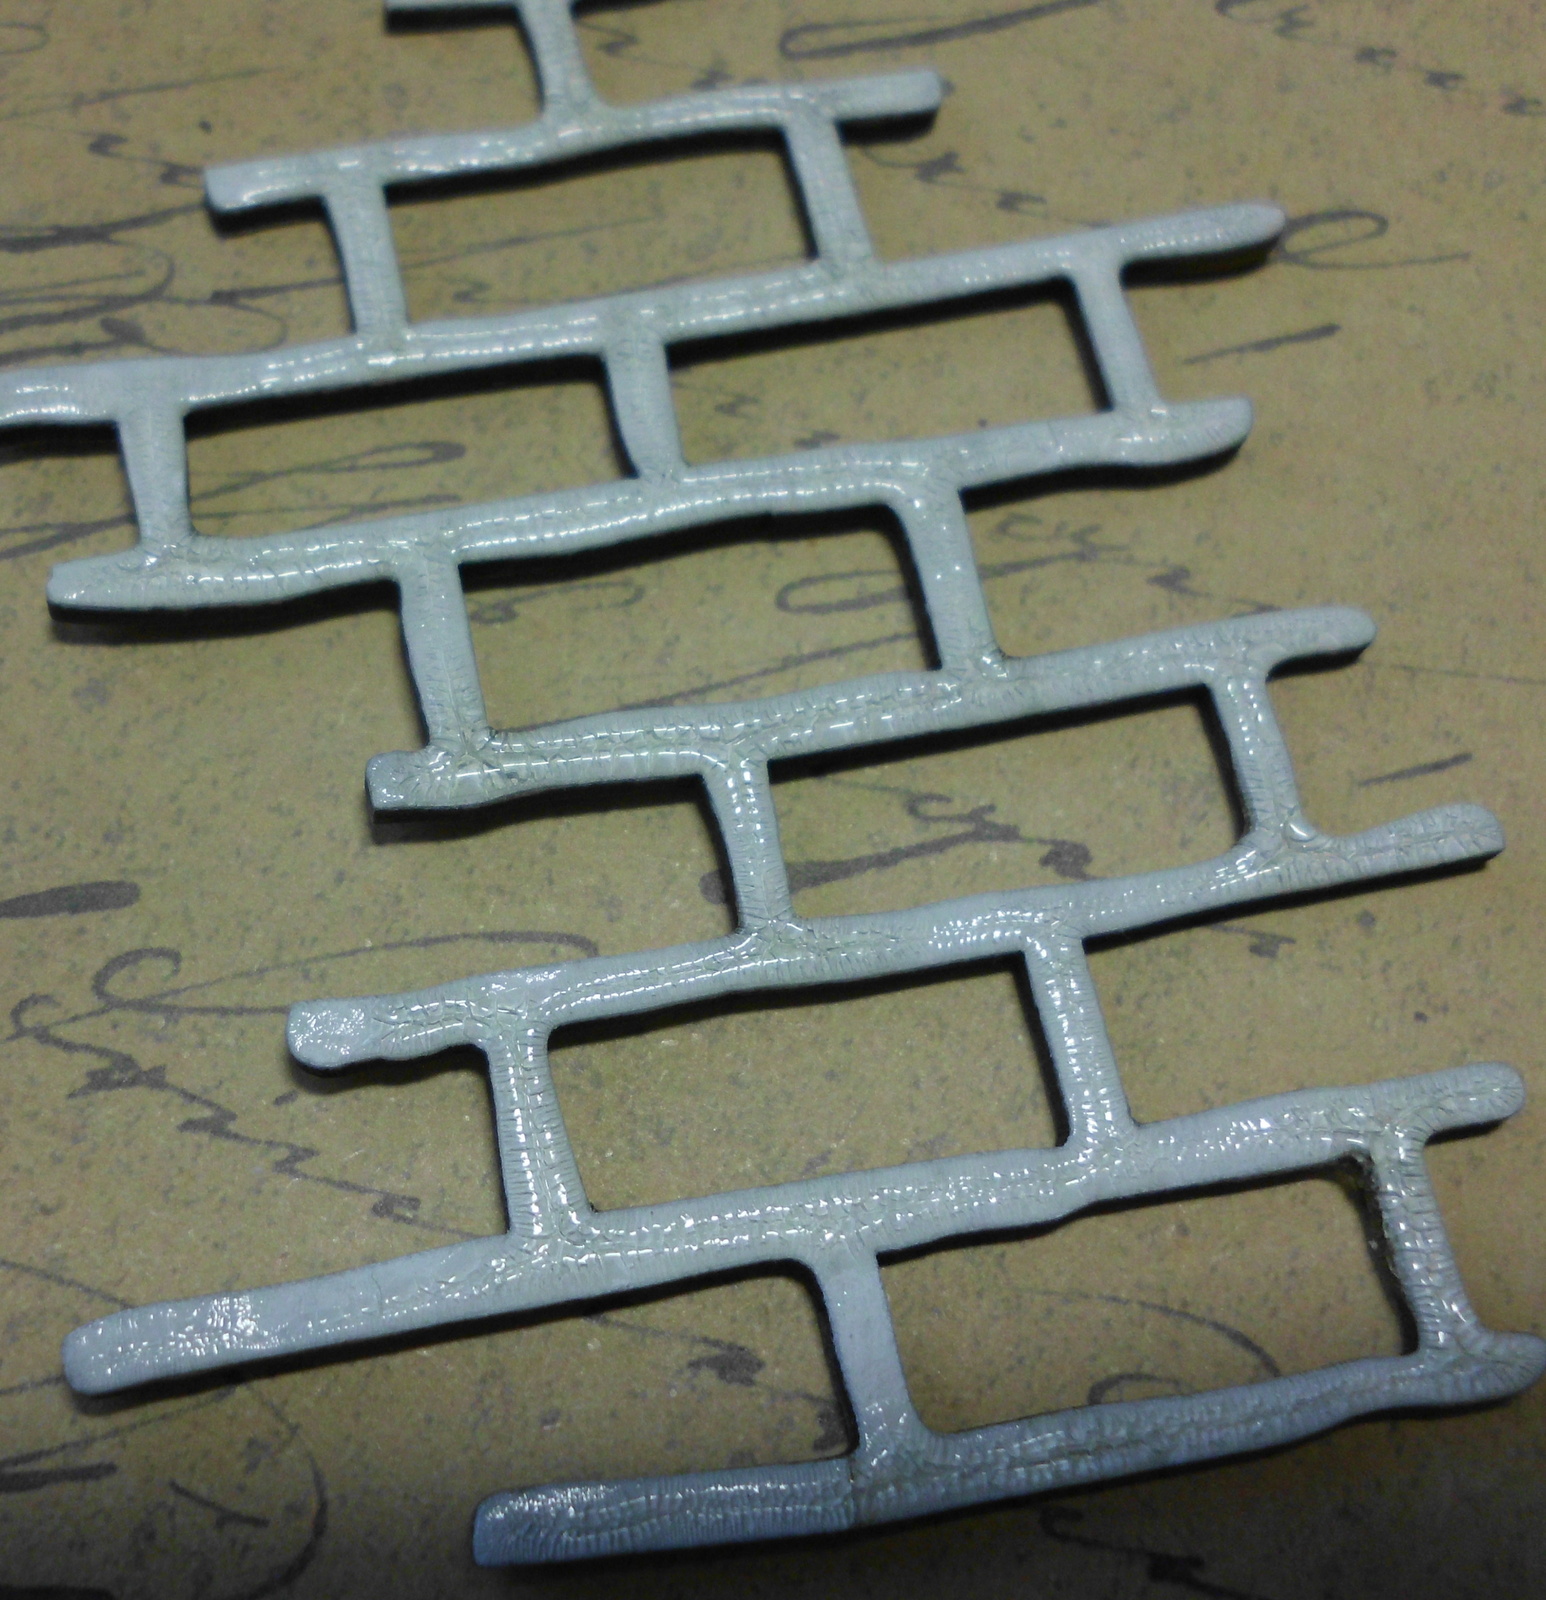


The Brickwork Pieces is done with Ranger Distress Crackle Paint in Rock Candy.  I love the little squares of crackle this gives, and will give the same effect thick or thin.  This was applied with the brush that comes in the bottle of Crackle Paint. 


Now you want my conclusions....... you are just busting to know that I find the crackling effect of all three products amazing....... for ease of use I say the Crackle Accents by Inkssentials is fool proof as it has an applicator nozzle and for lazy people like me it is so easy to use!!!!


Well that's it for us this time, thanks for calling in.

Love Lauren and Teddy

Wednesday, July 6, 2016

A2Z Scraplets Papercraft Challenges

Hello Everyone,


Today we thought maybe something a bit different was in order.  So Teddy and Lauren have decided to bring you some of the entries in our June Challenge!!!  How exciting is that?


The Challenge was all about using scraps and buttons.


 The first one we want to show you is by Charlene Easton and I love the way she has put together the page and the raw chipboard arrow with hearts carried through from the stencil background.  Love the colours and the seeming simplicity of the layout.  Clever use of scraps and buttons here.


This next layout is by Ebonee Goodings and is such a clever way of using scraps (and don't we all have loads of them?).  Love the glittered butterfly with the trail of buttons.


This fun and vibrant layout is created by Emma Moore.  Great use of scraps and we just love those buttons in orbit around the photos!  Love the simplicity of just colouring the chipboard.


The next layout is created by Jo Howard and it is just so cute that it makes us want to hug that baby tight!!  Love the chipboard colouring and the use of the buttons and other embellishments.  Just a gorgeous layout.


This next layout was created by Margaret Duck and shows great use of the scraps and buttons.  Again the chipboard is left raw and works so well on this page.  Lovely photos and great treatment of the scraps.


Now hop on over and see the new A2Z Papercraft Challenge for July!!
 
 This month we have a fabulous Mood Board Challenge with so many elements to choose from!!! Use your imagination and creativity on your project for your entry and upload to the album if possible or put your photo in comments and we can do it for you, One entry per person, closes 31 July 2016.


Oh I love playing with challenges, and have loved bringing you a sample of our challenge entries for last month. 


Hugs

Lauren


Wednesday, June 15, 2016

Pretty Cards

Hello Everybody!!!


Lauren and Teddy up today!!!!  Oh we just love sun-filled Winter Days!!! At the moment we are getting mega fogs in the morning and that fog burns off to be such a sunny day, we open the blinds and let the warmth come inside.  When it is like that I love to craft and Teddy and I have been doing a bit of that lately for you!!!


So we thought we would show you a couple of cards we have made for you :)


Oh today we have used one of the A2Z Scraplets Stencils Pebblestones - Stencilets & Masklets on the background with CM Metallic Silver, and sprinkled with Embossing Powder (Adirondak Wild Plum) and then heated.  I love this result.  Also used a recent release Decorative 9 Corner Set of 2 and painted it with Viva Inka Gold, so shiny, so beautiful, so vibrant.  You could use a paste or spray from the Colour Blast range in store.


Handmade flowers by me using the EK Success Flower punch in Whale and Medium size.  Tutorial here to make the flowers.


The second card we have for you has used those fabulous words for cards that A2Z Scraplets have available.  I love them.  Handmade holes around the edge of the card, but no stitching in it. 


Lots of dies, a stamp and I love those little rosettes that I have used a scoreboard to make, then decorated with charms, flowers and pearls to match my card. Leaves are painted with Glimmer Glaze.


Love that leaf die, it is by Crafty Ann and not sure whether Cheery Lyn have picked it up since they took over.


So proud of ourselves with this one!!  You know I like to recycle, well I have recycled the 'outer' of the Star Set of 2 Flourish, so 3 cards out of this chippie, how clever is that.  We have coated it with Stampendous Shabby White Embossing Powder. Went with  purple glitter paper behind it, as I found some leftover star shapes in my diecut box. 


This close up gives you an idea of how dimensional and textured this card is.  I love it!!!


Thanks for calling in, have fun papercrafting and get your hands messy with mediums!!!


Love Lauren xxxx


Wednesday, June 1, 2016

Gorgeous Cards

Hello Everybody,

 Yes you have Lauren and Teddy on the blog today and the weather has turned to Winter for our Birthday month (yes you can send pressies to us) :)


So here we have a couple of cards for you, very pretty ones with flowers and things on them.


This one has used one of the A2Z Scraplets Umbrellas with Stampendous Embossing Powder, Shabby White then stamped with a script stamp with StazOn Ink and reheated to smudge it a bit.


All the usual embellishments from me, seam binding, lace, flowers and pearls.


The second card is all frills and things as well.


 We started with a template and green for the new Leafy Template, then a doily die, the lace and ribbon.


The brickwall is painted with white.  the butterfly swirls is coloured with Tombo Dual Tipped Pens and then coated with Ranger Distress Crackle Paint, Rock Candy.  I love the crackle look.


Flowers were added and some stamen pieces and the word gorgeous was painted black and coated with Glossy Accents.


For those of you who have not met Teddy, here he is scrapbooking with friends :)  He is my sidekick and mentor and keeps me crafting on :)


Hugs from Teddy and Lauren


Wednesday, March 16, 2016

Loving Cards and Chipboard

Hello Everyone,


It is Lauren and Teddy up on the blog today with a couple of cards for you to have a look at and hopefully get some inspiration from.


So here they are:


The first is my usual shabby type card with a Paris theme, now who would not like to see Paris at some stage?


Viva modelling crème over Memory Box Stencil - Texture Splatter Spray, border and doily are Kaisercraft Dies - Lacy Border and Lacy Doily.  Butterfly is Memory Box Isabella Butterfly and Memory Box Pipi Butterfly.  Pearls are Kaisercraft Pearls.


Love, love in Paris, yes well this love is from A2Z Scraplets  Brush Words and has been decorated with black Tombow Pen and Glossy Accents


Love charms and decorated charms, I cannot take the credit for this one, it comes from Tracy at My2Angels. 


The next card is a bit Clean and Simple for me, such a stretch not to cover up that white space.


These gorgeous Butterflies from Z2Z Scraplets  are called Maisie Butterflies Set of 3  and they are just gorgeous and so perfect for this card!!!  Stamp from Kaszazz.  The Butterflies have been done with Stampendous Embosssing Powder Shabby Blue (I love these shabby colours), which gives a thick melt with a hint of blue on white with gold speckles.  The edges have been touched with Viva Inka Gold in Aquamarine.


A close look at the finish on these butterflies.
 
 
Hope you like these, go on, do some creating now, and don't forget about the A2Z Challenge this month, and we are also having an Easter Weekend Challenge with loads of challenges and fun and games :) Something for everyone including the kidlets!!  Check it out https://www.facebook.com/events/1663115533951222/ 
 
 
See you next time xxxx


Wednesday, March 2, 2016

Challenge Page On Facebook

Oh Hello Everyone,


Well how lucky are you to have Lauren and Teddy up on the blog today??   What an exciting week it has been with the launch of our very first Facebook A2Z Papercraft Challenge, so today we thought we would show you the cards Teddy made to inspire you, it is after all an Inspiration Challenge for March.  This is the picture to give the inspiration.


Now doesn't that picture give you great ideas of boys and play and boats and sand and beaches and pennants and blue and stripes and so much more!!!
 
 
So here is the first thought, a lighthouse on the headland surrounded by crashing waves.


 The background at the top is done with white ink in a Sizzix Embossing Folder from a due pack from Tim Holtz and I believe it is called rays, the bottom section is wax resist done with scrunched wax paper ironed onto glossy white cardstock and then inked with blue.  Hint: the more you scrunch, the smaller the pattern and more wax on your paper.
 
The gorgeous 18th Birthday Card Size Ebony from A2Z Scraplets came as is, coloured heavy card, so I left it as it was for this card.  The baker's twine is made by me (I love to save money using my stash items) and if you would like to know how to do it, here is a link to Pictorial Tutorial Making Twisted String.


The next inspiration came from the canvas of beach scene on the right hand wall, look at those gorgeous beach boxes on it.  So cute.


This one is a beach house using a Kaszazz Stamp coloured with Ranger Perfect Pearls (love using these to make shimmer paints, keep them in the palette and let them dry and they work the same as watercolour paints.
 
Birthday Boy is from the A2Z Scraplets - Birthday Set 1 Ebony and it is covered with a lovely thick coat of Ranger Glossy Accents, love this stuff because it keeps its dimension and dries so thick.


This next card is one Teddy has made several times, it is such a fun card and inspired by the blue teddy sitting on the cabin of the big boat toybox.


It is an uneven gatefold card and kept closed by those lovely turn mounts.  The Teddies are stamped in blue on vellum and then layered on navy then white.  Little paw prints are stamped randomly over the card front.
 
We are loving these A2Z Scraplets Arrow Words in the February Release, they are just gorgeous and there are so many to choose from with colours available too!!!  This one has been left the colour as is and coated with Ranger Glossy Accents.  (I need buckets of that stuff) :)


The last card is a masculine card (sometimes so hard for us to do) and it is inspired by the overall nautical and 'boaty' feel to the picture, and we turned it to a very 'aged' project.


This card has lots of DTP edging with Ranger Distress Ink Walnut Stain and the curled corners add to the overall 'old' look to the card.  Backgrounds are stamped with Lucy's Stamps Aged Cube and Rabbit Proof Fence (the text), edges torn or distressed, inked and curled.  The Happy Birthday is a Stamp-It Australia greeting.
 
 
Love the A2Z Scraplets Birthday Boy Set Cardinal and covered the birthday with Viva Crackling Colour Transparent very thickly as we find it really does give a great crackle.
The Anchor is die cut from a coke can, love to recycle things.
 
 
Hope you like these cards and find something in them you can take to call your own.
 
See you next time.... Lauren and Teddy
 

Wednesday, February 3, 2016

Layers, Depth and Texture

Hi there!!

Teddy and Lauren with you today with a little something that might inspire you and motivate us to make some more for you!!
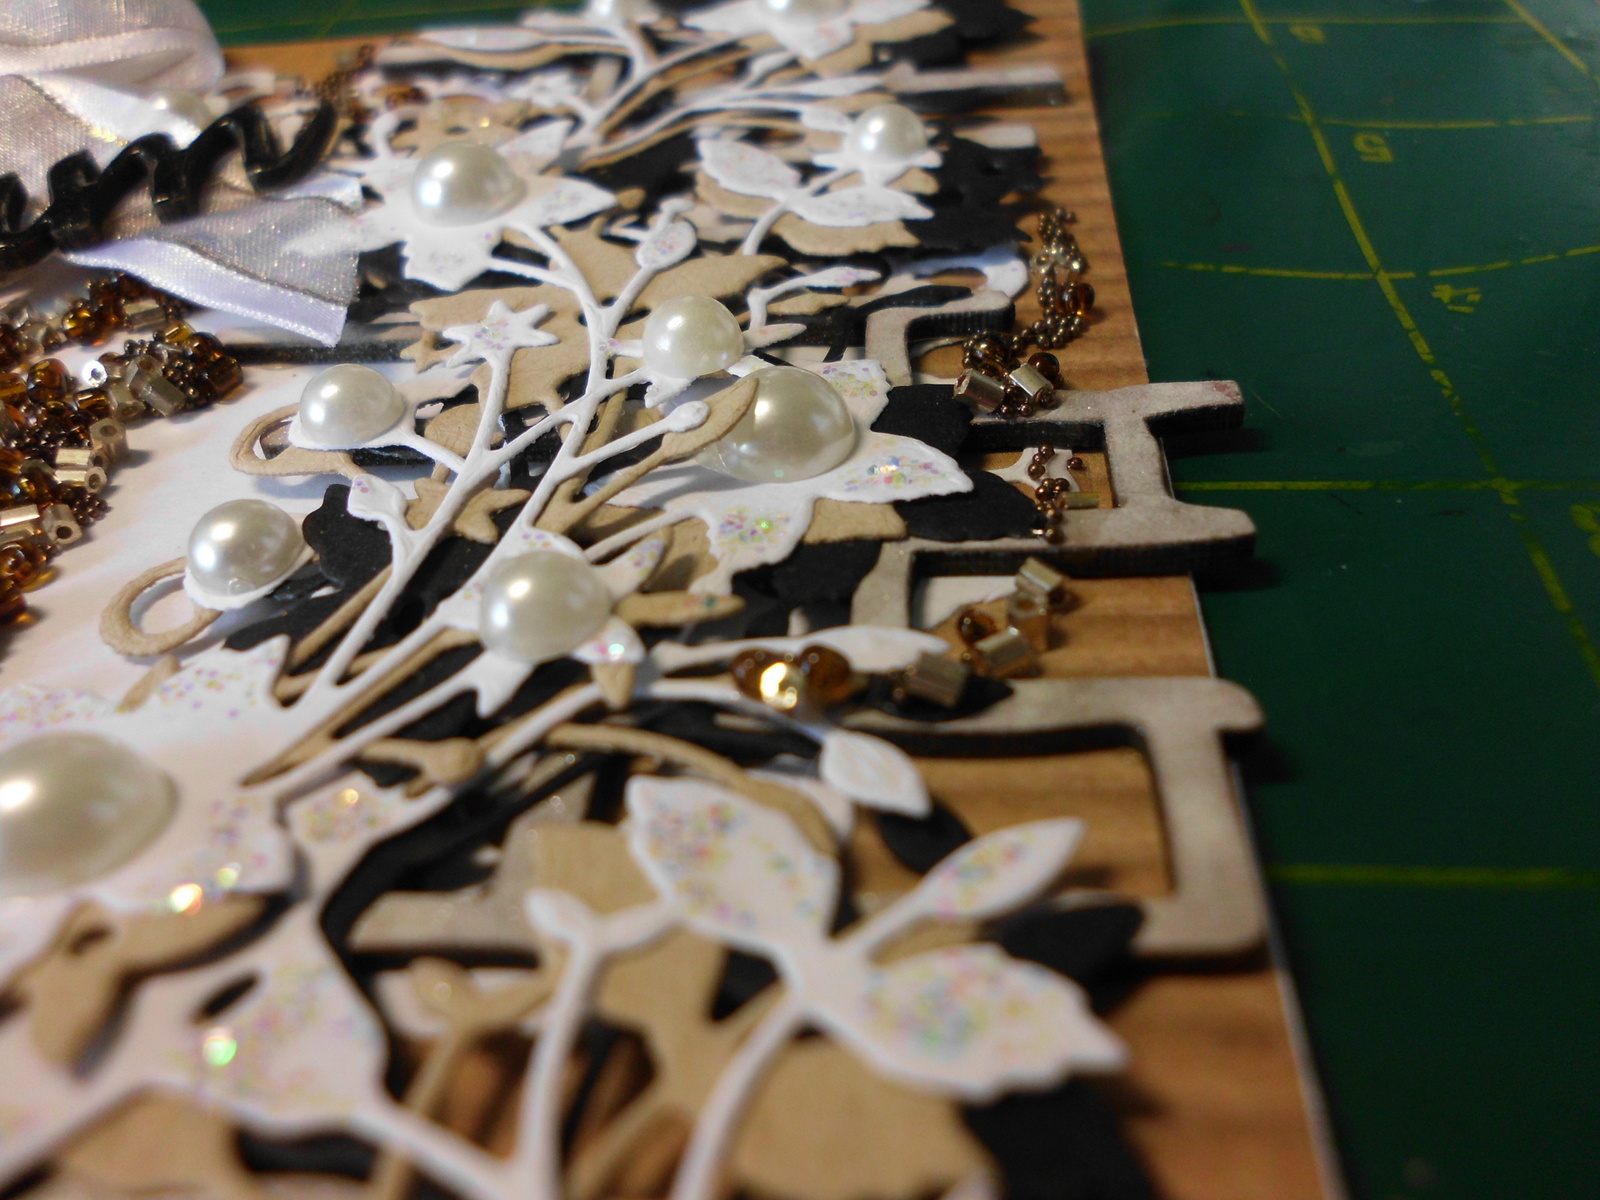
So we made you a card, how clever we are!!!


Oh this one is just packed full of goodies and is so pretty, in my favourite colours of natural with a background of Kaisercraft paper, the lace and ribbon, the lovely Catalina Wreath and Catalina Border from Memory Box Dies, A2Z Scraplets Chipboard Brick Background and A2Z Scraplets Dream word.  Finished with pearls (love my bling) and then Sugar Beads (mix of various seed beads and micro beads), just stunning.


Just loving the way the word turned out, coloured with Tombow Pen in Black and then coated with Glossy Accents (I love the way that stuff will keep its dimension while drying)


Loving that brickwork as a base to my die cut border, gives such a great feel of layering and texture, love to have different textures working together.


The die cuts have been done in three different colours and then slightly offset to give a great feeling of depth to them.  I like using this technique to really make the die cuts pop.


And just a tease to show the beads, just sprinkled over Glossy Accents where wanted and they look fantastic!!

Hope you like these effects as much as we do!!!

Love from Lauren and Teddy!!!! xxxx