Tuesday, April 30, 2013

Creating with Floralette 04!

 
Greetings A2Z Scraplets Fans!
Michelle here with my next GDT LO!
Today I'm creating with the new release word
Always be you and the new release Floralette 04!
I love this new release word chipboard, Always be you!
Such a fun, versatile, and expressive word!
They both will be offered in the store in a few weeks!
I used Tim Holtz paints, inks, and Creative Inspirations paint
 to decorate the chipboard title!
For the Gorgeous Floralette 04 to add more texture to the leaves I used a stencil and modeling paste.
I used Creative Inspirations paints and for the center of the butterfly
 I used micro beads.
The Floralettes are amazing, so many unique details, and designs!
They can be used for so many different projects! 
 
 
 Here's a close up of the Floralette 04!

 
Here's the link to view more of the Floralettes!
Thank you for visiting the A2Z Blog!
 Don't forget to check back to see the next challenge for May!
Have a wonderful day!
 

Monday, April 29, 2013

First Day of School

Hi there fellow crafters.  Sam here with you today for a share.  This year I have had my youngest child start Prep and it has been a very exciting year so far.  I was very excited on the first day of school because my daughter is just so little that she looks very cute in her uniform and she is the littlest in her class.  I finally got around to printing out photos of her first day and the A2Z Scraplet "First day of School" was the perfect addition to my layout.
 
I must admit I agonised over this layout and how to do it.  In the end I was inspired by a very talented friend of mine and I decided to do a take on one of her layouts that I loved (obviously after checking with her first).  I must say that I am very impressed with how it has turned out.


I just love how this scraplet turned out.  I first coloured the whole thing in with distress ink pad "chipped sapphire" I then dry brushed some yellow paint over it in places and then finished off with a coat of glossy accents for a shiny effect.  I was very impressed with how it turned out and worked with the layout.
 
 
I actually made my own flowers this time using the Tim Holtz - Tattered Florals die which I absolutely love.  It was fun making these flowers as I had a very special little helper and had my miss 5 helping me put them through the big shot which she thought was just great (my children are not allowed in my craft room, yes mean I know, I do crafts with them, they just don't usually involve MY stuff).  I then added a little bling & some chain.
 
I actually love how this layout turned out as I was not sure at first because I generally like to use a lot more embellishments.

 
That is it from me for now so until next time I hope you have heaps of fun creating.  Don't forget to check out our monthly challenge and check back regularly for more wonderful creations from the design team.
Have a great day :)
Sam

Sunday, April 28, 2013

Embellish with COGS-old and NEW!

 
Today I'd like to share a couple of layouts using these amazing chipboard embellishments which will add some dimension to your project without adding too much bulk! I used a mixture of existing stock and some of the terrific new release cogs too which will be in the store soon. They are great value for money and very versatile in their use. I left them mainly as raw chipboard as they toned in so well with the Kaisercraft papers but did ink the edges on some for definition. The first layout is of my youngest son Brendan on the Zipline in Alaska last year....the title says it all!!!!!!!!!!
 

                                              Here is a close up of some of the new cogs.....


                                                         A close up of the new cog........


The new cog is painted brown with the word FUN on it.  
 
 
Till next month,


Live well, laugh often, love much, leave memories!

Happy scrapping,
Monica


Friday, April 26, 2013

Some last minute Challenge Inspiration

Hi everyone! Amy back today to share some last minute inspiration for this month's A2Z Scraplets challenge. Have you entered yet? You can view the details here.

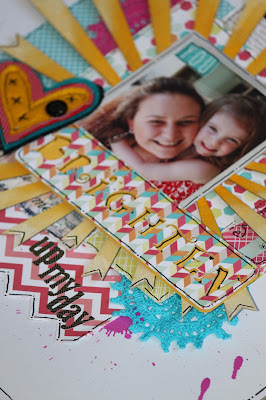
The challenge this month was set by the fabulous Belinda and is a quote challenge. The quote to use is "You Brighten Up My Day".


For my layout I have used some fabulous bright Echo Park Papers  along with some white cardstock and Dylusions Ink Splatters. 


The A2Z Scraplets I have used on this layout is the fabulous Starburst 2 - Large which comes in 2 pieces. I have used this piece so many times and I still have so many more ideas to use it.


For this layout I have trimmed the starburst inner piece to create random length banner looking starbursts. To decorate I have used a sponge and very roughly added some thin White Gesso followed by 3 different shades of PanPastel Colours. I started on the edgesWhite, then the middle with Diarylide Tint, followed by Diarylide Yellow in the very centre. Each time I added a darker colour, I have swept th Sofft Sponge outwards to create the gorgeous Gradual tone. To finish it off I have sprayed some Fixative and Laquer over the top.


You can checkout the Large Starburst 2 Shape on the A2Z Scraplets website here

Don't forget to head on over to the April Challenge here and enter before Midnight on the 30th April! 

Until next time, happy scrapping!

Amy Prior xx

Thursday, April 25, 2013

Creating Background LO using New Flourish Stencil!

 
Greetings A2Z Scraplets Fans!
Michelle here today sharing a mini tutorial creating
 background paper with a new Flourish stencilet 02!
Here is the finished Layout!
 

I used Heavy Gel medium to apply the stencilet to the paper! 
After the gel medium dried I used Distress Ink Vintage photo and Distress Ink chipped Sapphire.
The cherish word new release chipboard I used some distress ink and added some Creative Inspirations Gold paint over the top
after I distressed the chipboard.
For the new release Floralette I added Distress crackle paint to everything except for the 2 light colored flowers, which I used Gel medium modeling paste with beads for texture! I also used glass glitter in rose for 2 smaller flowers and the butterfly. 
I used Creative Inspirations paint on the other flowers
 and on the stem and leaves. 
I left the LO simple because I really wanted to focus on the
background stencilet design!
                          Here is the new release of the Flourish Stencil 02!
         Below are the instruction on how I used this to create the above LO!

 
 I used the glossy Heavy Gel Medium and my craft spatula to apply this over the stencilet!
 This is how I added the stencilet and then I left these
two stencil prints to dry before applying the other two to the paper.
As you can see I lined up the stencilet with each outside edge
 so I would have room to add the stencil to the other corners.

Here I added the last two stencilet to the paper! The stencilet are dry with this picture that is why the stencilet look more opaque in color!
 When the stencilet prints are dry they will look opaque and if you are not sure just gently touch some area's lightly with your finger tips.
Once completely dry you can add your paints or inks!
I used Distress Ink Vintage photo and Distress Ink Chipped Sapphire!
The inks were blended and mixed randomly and that is why you will see that I left some of the blue and then you will see some greenish tones because I blended the two colors together! Where you see the areas where it is shiny that is where I left more of the opaque stencil area less covered.
If you don't like some of the shiny look to show just rub some more ink over the opaque area!

 
I hope you enjoyed seeing how I created the background of my LO!
The stencilets & Masklets are so versatile and Julie keeps adding more  designs! What are your favorites and have you created anything with the stencilets or Masklets? If so please share them on the A2Z Facebook we would love to see them! This new stencilet and Cherish chipboard word will be released in a few weeks!
To view the new releases of stencilets, chipboards and masklets here's the link!
Thank you for visiting the A2Z blog today!
Michelle, GDT.

Wednesday, April 24, 2013

Bright Eyes

Hello everyone,

It's a been a while since I posted here but I plan to have a few more shares for you all soon.

This layout I am sharing today was inspired by some super cute pics of my daughter. The other day she was just chilling out in her rocker and I decided to have an impromptu photoshoot to practice getting better pictures with my camera. Afterall, I think great photos play a big role in great scrapbooking. While not every photograph you scrap will be perfect, because life isn't always perfect, it is nice to try and have better odds in capturing good pics and that comes down to getting to know your camera. My camera and I still have a lot to learn about one another... but we're working on it.

I really need a 50mm lens to get these up close shots as they are harder with the big DSLR lens, but I still love the end result for a novice!

And of course complete with a fab A2Z scraplets title - Bright Eyes


Thanks for visiting
Holly
 

Tuesday, April 23, 2013

NEW RELEASE scraplet BANNERS

Julie knows how much I love banners and so I was delighted to receive some of her new designs in the mail.  I'm sure you will put these on the top of your shopping list! Here is the first one...

                                                 STRIKE A POSE WITH A BEAR!

 The next is a gorgeous HEART BANNER which was my immediate choice for this layout.  This wedding photo had been on my TO-DO list for many months. I painted the scraplet first in cream paint, then blended grey and black ink over it, outlining in black and finally adding pearls and draping some pretty lace around it. The title that Julie specially designed for it, provided the perfect finishing touch!
 
 OUR SPECIAL DAY 


Here is another awesome one which I painted then decorated and finally added crackle paint. Also included on this layout are the new ARROWS.
 
 
                                                                  IT WAS THIS BIG

and finally this beautiful FLOWER banner...........
 
                                                                          SISTERS


                                  Visit the store as these new banners will be available soon.
                                                                  Thanks for viewing,
                                                                             Monica


Monday, April 22, 2013

Faith, Love & Light

Howdy everybody! Long time no see. I am so excited to be back sharing one of my latest creations with you all. First of all I have to say I am so sorry for being missing from the Scrapping World for the past 6 months. I won't go into details but due to lots of medical issues I was completely unable to function anymore and just had to step back for a little while. I am happy to report that I am back and ready to share lots more inspiration with you all!

Today I have a fabulous Off the Page Project to share with you all repurposing a shabby bird cage along with lots of pretty things!


Now I have lots of photos to share but these photos truly does not do this creation justice. In the bottom of the birdcage I have placed some hand dyed vintage tulle with some LED Battery Operated Fairy Lights wrapped around. You cannot see the beautiful lights that well in the photo but it is truly magical.


On top of the tulle I have placed an altered bird, some Beaded stems along with the fabulous Paisley 38 from A2Z Scraplets. To decorate the chipboard, I have simply coverd it with crackle paint and then sprayed with some Dark Brown Glimmer Mist. I sprayed enough to let it pool up and seep into the cracks to get a nice aged look.


Now for the gorgeous cross. I have taken these seperate photos so you can see the beautiful details up close. This 3D Cross was actually cut using my Silhouette Cameo Machine using Prima Papers & Acetate. 


Nested among some amazing flowers from some of my favourite brands, are these gorgeous A2Z Scraplets Street Sign Shapes. To decorate the chipboard, I have coated with a thin layer of Gesso followed by some Acrylic Paints in Dusty Pink & Cream on the are I wanted to write. The rest of the sign posts were inked using some Archival Ink in Coffee Brown. I have also used a finger dauber to add some subtle distressing to the edges of the painted areas. I then finished them off with one of my favourite bible verses using my Sharpie Fine Marker.


Checkout that gorgeous collection of pretty flowers! Love the details on this project.


To decorate the cross, I have simply coated the beautiful bright Prima papers with some Helmar Crackle Medium, and then rubbed some Pink Metallic Cream Chalks into the cracks. I just love


Again I have used the A2Z Scraplets Street Signs Post on the back with yet another Bible Verse that I love. To decorate the chipboard, I again, have coated with a thin layer of Gesso followed by some Acrylic Paints in Dusty Pink & Cream on the are I wanted to write. The rest of the sign posts were inked using some Archival Ink in Coffee Brown. I have also used a finger dauber to add some subtle distressing to the edges of the painted areas. I then finished them off with one of my favourite bible verses using my Sharpie Fine Marker.

Here is a closer look at those fabulous A2Z Scraplets! Click on the image to view them on the website and purchase today.


Until next time, happy scrapping!

Amy Prior xx


Sunday, April 21, 2013

Fly like a butterfly and dream too!

Hello my dear crafty friends! Irit is here again and this time I want to show you my altered Home deco piece made with a border Circles chipboard. Did you try to use A2Z Scraplets fantastic border chipboards for anything else then a scrapbooking border? If not- here is an example for you. I painted this great chipboard with white crackled Ranger paint and added a bit of Tattered Roses distress stain. That's all. It was glued over the wooden plaque and I glued all those stamped and hand cut butterflies heat embossed in this trendy Ombre style.(same color from light to dark shade)
Then the Thickers title was added and a few of my favorite resin buddies too.


Here are some fragments of this project


My second home deco project was made with a wooden big bird shape, but A2Z Scraplets  were just a NEED to make my golden glittery  Dream title and a corner embellishment.


Hope you liked it and will try to use our fantastic chipboards for your home deco and altered art as I do!

Wednesday, April 17, 2013

CHEVRONS 2 stencilling.

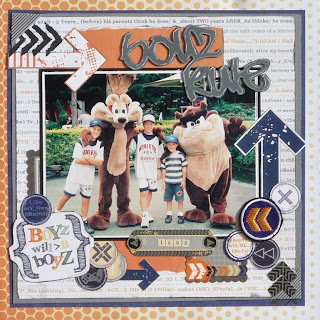
I am enjoying the opportunity of using stencils on my layouts. The patterns on this paper collection from Kaisercraft worked well with the Chevron 2 Stencil and I decided to simply sponge paint it onto the layout.

Just love the title Julie designed for this layout.
                                        Also used this awesome BORDER STRIP STARS.
Border Strip - Stars

                                                    And here is another one to share......
  
 
Chevrons 2 - Stencilets & Masklets
 
Boyz Rule - Word


I look forward to seeing your layouts using the new range of stencils available direct from a2z.

                                                          Happy scrapping, Monica:)

Sunday, April 14, 2013

Imagine mini book cover

Hello my dear crafty friends! Irit is here again and this time with my  A2Z Scraplets
Not a scrapbooking inspiration. Lately I like to make mini albums and the main part of them is usually a cover. So here is my new mini album cover (the inside will be done sometime, I promise)
I used  this most gorgeous Bird cage white heat embossed and I added a bit of a peach embossing powder over the bird to make it stand out. The corner chipboard was partly heat embossed with Copper powder and  my Imagine title was heat embossed with a multiple embossing layers with red powder and some copper and even some black one to get this rich over embossed look.


Hope you make mini books too and will use some great A2Z Scrapelts for your minis too.

Saturday, April 13, 2013

April inspiration. Dance and weddings what more inspiration do we need :)

Hi Crafty pals,
Caz here with you today to share a couple of new layouts I have created using some lovely A2Z scraplets. The first is of my daughters dance concert back in December 2012.


 I love this photo of her and hope I did it some justice. The swirly vine scraplet up in the top left corner just added a little bit of something that it was missing and I sprayed it with a silver glimmer mist to tie it in with her outfit.
I love the scripty words so the Inspire title scraplet was perfect and she does inspire me.

And a couple more close ups for you


Next we have a wedding layout of my friends wedding back in February. The Bridal party scraplet was just perfect for this photo.I painted it with liquid pearls in the colour Platinum pearls which was perfect for the colour theme.
And of course a few close ups for you.


I hope you have found some inspiration. Have a wonderful weekend.
Happy Crafting
Caz xo