Showing posts with label gel pens. Show all posts

Thursday, March 17, 2016

Just The Way You Are


Good morning! I hope you're having a fabulous day and getting some time in your crafty room! Today I have a nice and simple layout to share with you.


I've used papers from a mixture of collections by Echo Park, fabric tape and some doodling.


The Just The Way You Are scraplet was embellished with Stampendous Shabby Green Embossing Enamel, and the Chain Link scraplets were inked with StazOn Dove Grey and outlined with a white gel pen.

Until next time, keep calm and craft on!


Thursday, February 4, 2016

You Are My Happy


Hi again! 

Today I'm sharing a layout using the perfectly appropriate You Are My Happy scraplet. It was coloured with Derivan Matisse Red ink - this ink is freaking fabulous, it's permanent, vibrant, and it doesn't reactivate if you were to add another colour on top! (tutorial for this coming up soon). After the ink dried, I outlined the chippy with a white gel pen to make it pop. 

This layout was inspired by a sketch over at Sketchy Boards Challenge, using the Hello My Name Is collection by Teresa Collins with blue cardstock.


This scraplet is perfect, he really IS my happy! And look how lovely and bright the red is!


And top it off with a button cluster!


***

Before I go, I'd like to share this layout (also inspired by a sketch at Sketchy Boards Challenge). The Cogs on the bottom left were inked with Pumpkin and Olive Staz On inks, the Cogs on the top left were wrapped in Washi tape to give a funky effect. Both were outlined with a white gel pen.


I hope you like them! And as always, keep calm and craft on!


Wednesday, January 20, 2016

Delicious!

Hi Deb here today. 

Oh, do I like food. Most food but especially Thai and Vietnamese Food. Thankfully my husband does too because I cook it quite a bit. Our holidays tend to be a bit of a foodie taste trail and a gathering of recipes. 

This page represents the wonderful selection of meals we ate at a delightful little beach restaurant in Koh Samui. 


Below is a close up of the title Delicious which I colored with gel pens.


The Thai Food Circle word I left mostly raw and just colored the bowl. Again, using gel pens. When it comes to the best types of pens to use I have found that many of the cheaper 'supermarket' or 'department store' brands quite adequate. In fact my favourites are actually Aldi's metallic gel pens. With the advent of the coloring craze at present there are a huge range of all sorts of pens on the marker. Experiment - you may find some very pleasant surprises in the finishes achieved. 


Material used:
A2Z Scraplets Chipboard
Bella papers and tags
Bella Cardstock
Dymo tape
Ribbon

Until next time
Happy Scrapping
Deb


Thursday, October 1, 2015

Crazy Doesn't Begin To Describe This!

Hi there! Here is a layout about some funny photos I took of my Master of Mayhem. He loves Puss In Boots from Shrek. One night he wanted something and I said no, so he gave me the Puss In Boots eyes. I told him it doesn't work without the hat, thinking that would be the end of it. But oh no, 2 minutes later he was back... with his hat hahahahaha


The Crazy chipboard was coloured with felt pens, coated with Dimensional Magic and outlined with a white gel pen. The black words were coloured with a glitter gel pen.
The Doodlet 11 chippy was also coloured in with a felt pen, coated with Dimensional Magic and outlined with a white gel pen. 


I love creating layouts that have a fun story behind them, and these photos always crack me up!

Until next time, keep calm and craft on!

Karyn


Thursday, September 17, 2015

Crayon Canvas


Hi there! So I've been seeing these canvases all over the place where people have melted crayons onto so I thought I'd give it a try. A little tip... keep a non-stick mat underneath your canvas while you're melting the crayons or else you'll end up with a HUGE MESS EVERYWHERE! If you can, just melt the tips of your crayons rather than the whole things. I went a little overboard and melted them ALL. Super fun, but super messy. Also, do this is a well ventilated area, the smell can get a bit overwhelming.
This is my first attempt at this and I can't wait to have another go, it's LOADS OF FUN!!!


I covered up the part I wanted underneath the umbrella and then glued all the crayons to the top of the canvas randomly after peeling the papers off. Probably why they melted fully instead of just the ends like you see in all the pictures on Pinterest hahahahaha. After melting, I peeled away the paper covering the spot where the Umbrella chippy was to go and glued it down, along with the Teddies. Then I added the Chevrons to the top. All of the chippies were just coloured with felt pens and outlined with a gold gel pen.


Have you tried making a Crayon Canvas? We'd love to see it, please feel free to post it to our facebook page!

Until next time, keep calm and craft on!


Thursday, August 6, 2015

Cute Storage!

 Hi there! I've been on a bit of a BTP kick lately, I hope you're enjoying them! Here is a cute little set of drawers. I added the A2Z Scraplets Flourish 43 after painting them white and outlining them with a black gel pen.


Thanks for looking :) Until next time, keep calm and craft on!

Karyn


Thursday, July 16, 2015

Fun At The Park

Hi again! Where does the time go? I can't believe how quickly this year is flying by.

Between work, homeschool, and building a new house, I haven't had as much time in my crafty room as I would normally like, but I did get enough time this week to whip up this simple layout to share with you.

I created this layout with the Fun at the ParkChicken Wire CornerChicken Wire Border and 2 out of the set of 3 Helicopter chippies. 


As usual, I've coloured the chippies with felt pens, coated them in Dimensional Magic and outlined with a gold gel pen.


I hope to get a bit more crafty time soon so I have lots more to share with you!
Until next time, keep calm and craft on :)

Karyn


Wednesday, July 8, 2015

Life On The Edge!

Hi again A2Zers! 
If you're here, chances are you're as obsessed in love with papercrafting as I am! Luckily my husband also has a hobby that keeps him busy, so he doesn't notice the ridiculous amount of goodies I cram pack neatly into my craftroom. And while his hobby absolutely terrifies me, it does provide me with some incredible photos! When I saw the Life on the Edge chippy, I knew it would be perfect for this layout using the Scrapyard collection by Kaisercraft.


I used a black Sharpie to colour the Life on the Edge! chippy and outlined it with a silver gel pen. The Heartbeat border chippy was also perfect for this layout, as my heart always feels like it's about to jump out of my chest whenever he's on the track. The Gears chippies you can see peeking out from behind the tears in the layout were coloured with a silver gel pen.


To make the photo stand out, I printed 2 copies, cut 1 out and layered it over the top of the first one. A very effective technique!


I love that I've created layouts of my husband's achievements on his bike, and I love even more that one day when we're long gone, our great great grandchildren are going to see just how cool he was.

Until next time, keep calm and craft on!
Karyn


Thursday, July 2, 2015

Celebrations Calendar!


Hi there A2Zers! 
How are the school holidays treating you? We baked a yummo Malteser chocolate cake today. 
Om nom nom! 
I've also been lucky enough to have some crafty time, so I whipped up this gorgeous Family Birthdays Calendar
However, I wanted mine a little more personalised and to include family celebrations as well as birthdays. So I asked the lovely Deb from A2Z Scraplets to make mine with WATTON celebrations as the title instead. If you ask nicely, she might even personalise one for you ;)


I've used a lovely yellow and white chevron background with WATTON and the months painted black and outlined with a white gel pen. The Butterfly chippy and celebrations word were covered with Stampendous Shabby White Embossing Enamel


I can't wait for my next card making day so I can whip up a bunch of cards ready to send out for these wonderful celebrations!

Until next time, keep calm and craft on!
Karyn


Thursday, June 18, 2015

Reverse Canvas FUN!


Hi there! Have you tried creating a Reverse Canvas yet?? If not, what's stopping you? They're super easy and look amazing! Here is one I created using an oval canvas by Mont Marte, the Fly Free collection by Kaisercraft and the A2Z Scraplet Doodlet 29.

First up I punched out a bunch of hexagons with my Fiskars Hexagon punch and outlined them with a gold gel pen. They were then glued down onto the reverse of the canvas. The photo was matted, outlined and mounted on foam tape to give dimension.

The A2Z Scraplet Doodlet 29 was coated with Stampendous Aged Gold embossing enamel. I didn't have any embossing ink so I just used a glue stick to adhere the embossing enamel before melting it with the heat gun. I'm not sure if it changed the effect as I've only used it with glue, but I LOVE it! It's so chunky and bold! Check out the range of embossing powders and enamels from A2Z Scraplets HERE.


I added a strip of patterned paper around the inside edge, and Kaisercraft Ribbon Roses around the frame. Some very cutesy flowers from Scrapping Life were clustered over the corner of the Scraplet to finish. 


What did I tell you? Too easy! I sure hope this has inspired you to create your very own reverse canvas. OH and a little TIP... If you want to ensure dust doesn't settle on your masterpiece, glue a piece of acetate over the frame before adding your ribbon roses.

Until next time, keep calm and craft on!
Karyn :)


Thursday, June 4, 2015

Awesome

Hi there A2Zers! Are you loving Kaisercraft's new collection - Scrap Yard as much as I am? It's perfect for all of those masculine photos! 
This photo is of my husband and his cousin, although they're more like brothers than cousins.

I've used the Scrap Yard collection by Kaisercraft for this layout, titled Awesome.


This gorgeous A2Z Scraplets Industrial Large Corner chippy was spritzed in Kaisercraft's new Charcoal Mist with the Peach mist spritzed over the top. These mists are fantastic. Full of colour as well as some glimmer.
To get the effect around the photo, I just scribbled with a white gel pen all the way around, I love how it turned out!


The Awesome chippy from the A2Z Scraplets Awesome Fabulous set has been coloured in with a burnt orange pen on the top half and a black Sharpie on the bottom half. Then the whole thing was coated in Dimensional Magic and outlined with a black gel pen. It's given a very cool effect.


I hope I've been able to inspire you to get those masculine photos out. This collection truly is what you've been waiting for. And when you couple it with A2Z Scraplets, you can't go wrong!!

I'd also like to share this Tag album with you as well! I've used the A2Z Scraplet All You Need Is Love


The Scraplet was painted grey and outlined in a white gel pen.


Until next time, keep calm and craft on :)
Karyn


Thursday, May 21, 2015

Meow!

Hi all! I don't know about you, but I love creating layouts about my fur-babies! They provide an awful lot of gorgeous moments to scrap :) This is my precious Dumpling, he's a real character!

I've used the A2Z Scraplet - Meow, from the  Meow, Purr, Sleep wordlets. It's been coloured in with a yellow ZIG chalk pen and outlined with a black gel pen.


I love grunging my layouts up a bit simply by adding some staples, give it a try! 


Until next time, keep calm and craft on!
Karyn


Thursday, May 7, 2015

Truly, Madly, Deeply

Greetings, lovely A2Zers! I hope you've all been well, and creating lots of masterpieces :)
I have a layout here to share with you titled Truly, Madly, Deeply. Sorry for the poor quality of the photo in the layout, it was snapped with my phone at midnight on New Years in the dark. My favourite photo of me and the hubster EVER - even with the dodgy quality :)

I painted the Heart Frame from A2Z Scraplets blue and then coated it in Diamond Dust. Man, I love this stuff! All papers and the title were outlined with a white gel pen, my favourite way to make things 'pop'. Give it a try some time, you won't regret it!


I hope you've been inspired to head to your crafty room! 
Until next time, keep calm and craft on :)
Karyn

Thursday, April 16, 2015

My Everything

Hi again! I have 2 creations here to inspire you today :) 

First up is titled My Everything. 
This layout was created with 2 gorgeous A2Z Scraplets chippies - My Everything and just one of the 4 Chevron Borders which I cut up into 4 smaller pieces, also the Hello Today and Sandy Toes collections by Kaisercraft, with White and Sand coloured cardstock. Inspired by the colour challenge over at White With 1.


Did you know we've begun monthly challenges again?
Kerry has offered up a gorgeous mood board to inspire us for April:


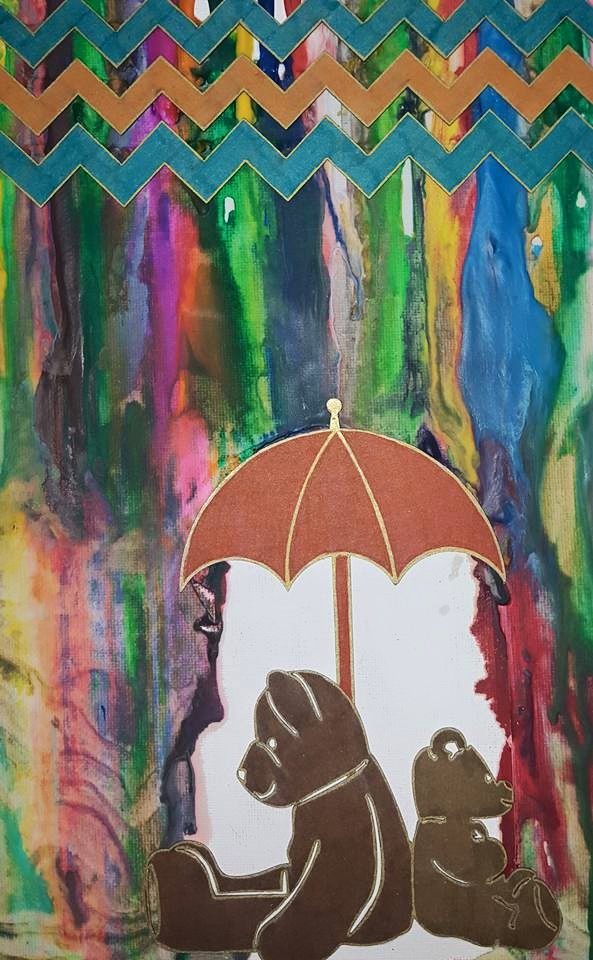
Here is my take. I was inspired by the clouds, quote and outdoors scene. 
I hope you enjoy it!


I designed and cut an MDF cloud-shaped album specially for this project. I feel it suited the A2Z Scraplet - The Sky is the Limit chippy and this wonderful challenge perfectly!


Just incase you were wondering how I got the effect on the chippy, the Heavy Gesso by Prima is so thick it acts as a texture paste. I used 2 coats (with about an hour of drying time between coats) to get the final result. The picture below is after the first coat. The words were coloured with gold gel pen, which was also used to outline the entire album.


To join in this challenge, simply create your masterpiece - inspired by this gorgeous mood board, of course - and upload it here in the comments or on our Facebook page. It's as simple as that! I can't wait to see your take :)

Until next time, keep calm and craft on!
Karyn